Installing the Interjector™ (IXR™) requires electrically connecting one lead from the Interjector to one wire of the fuel injector, and the other lead to the other wire. In other words, the IXR is installed in parallel with the fuel injector. One IXR is required per fuel injector. This Guide illustrates installing the IXR in a non-invasive manner, where the leads are slid into the factory connector, through the rubber seal, and make electrical contact with the metal connector terminals. Stripping wire insulation back and soldering the Interjector leads directly to the wire is a more secure method, recommended for permanent installations. However, the method outlined herein allows for testing without modifying the factory wiring harness, making permanent modifications.
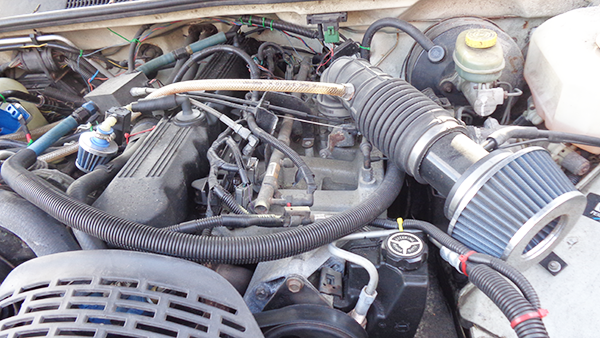
First and foremost, the IXR™ should not be installed on a stock engine, as it works as a “compensator” to enable economy gains from combustion enhancers. The engine used for this Installation Guide is an older Jeep 4.0 liter inline 6-cylinder. Take note of the extensive visible modifications; free-flowing air cleaner, PCV vacuum regulator, MHE, and some less recognizable items. This engine definately qualifies for an IXR installation.
Tools
Required tools are minimal; a digital ohm meter and electrical tape. A knife or scissors will cut the electrical tape squarely, keeping the appearance looking more professional. You will be installing one IXR per fuel injector, so the image above applies to a 6-cylinder port fuel injected engine.
Additionally, you should have an OBD-II Scan Tool for vehicles 1996 and newer (the Jeep is a 1995). Before installing the IXRs, drive the vehicle and note the LTFT% and STFT% fuel trims. Ensure the oxygen sensors are operating optimally. If the oxygen sensors are anything less than stellar, replace them (with factory OEM parts ONSY!) and retest before installing the IXRs. In fact, if the O2 sensors have more than 90k miles, or are older than about 7 years old, it is recommended you replace them as an insurance policy. The oxygen sensors are a crucial part of getting fuel economy gains with the IXR, and should be given utmost consideration! As per the Training Program, only Factory OEM oxygen sensors should be used, no aftermarket replacements!!
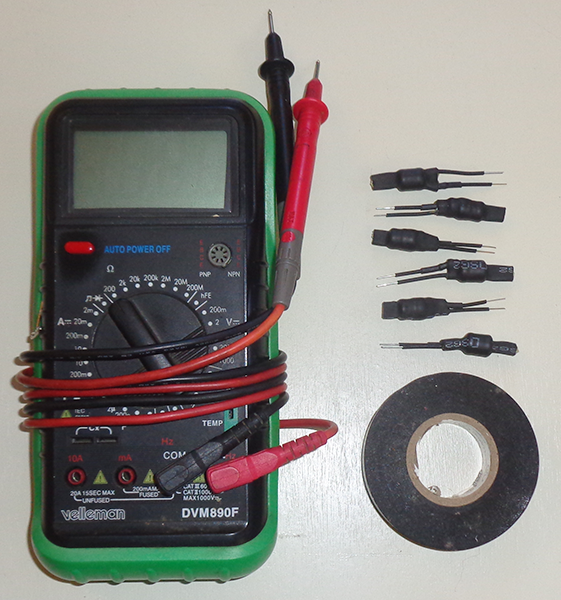
Required equipment; DVOM, electrical tape, and IXRs
The Installation
The first step is to disconnect the wiring harness connector from the fuel injector. There should be locking tabs, either on the sides (as shown below) or to the front/rear. Simply squeeze and pull. Make sure the ignition switch is OFF (remove the key to be sure).

Squeeze the side tabs and pull
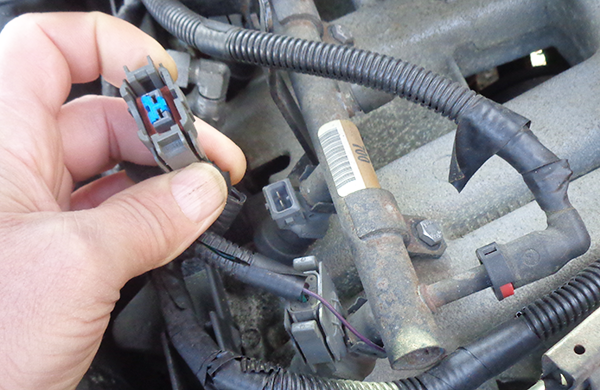
Congrats! You removed the fuel injector connector. That wasn’t so bad.
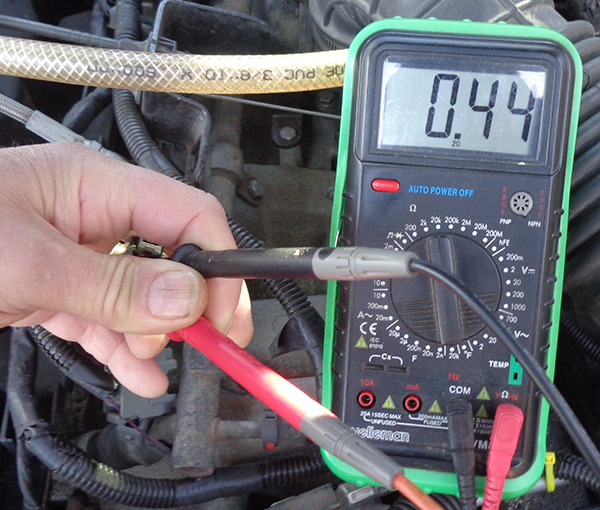
With your ohm meter on the 20k scale, check resistance across the connector leads. It should read open.
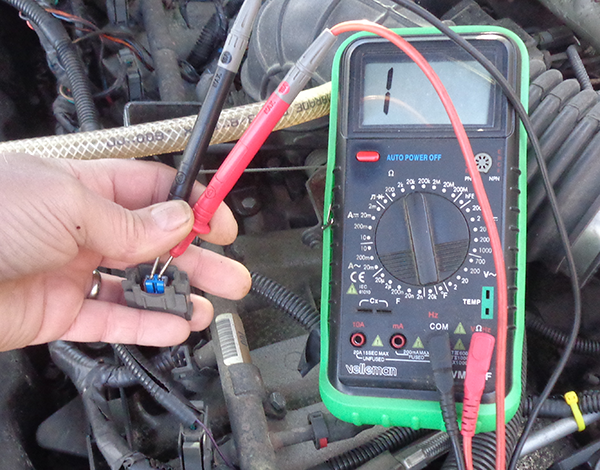
With the Key Off, the injector connector reads as an open connection.
Next slip the InterjectorTM leads through the rubber seal so they connect with the metal connector terminals.
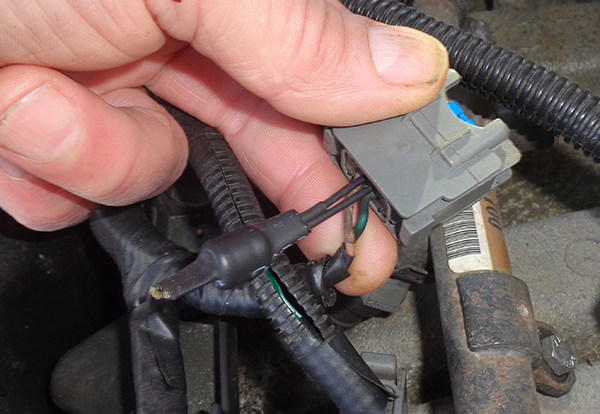
For testing, the IXRTM leads can be sistered beside the factory connector wires.
Verify a good electrical connection with your ohm meter. You should see a relatively low resistance now.
In this case, 0.44 k ohms (~440 ohms).
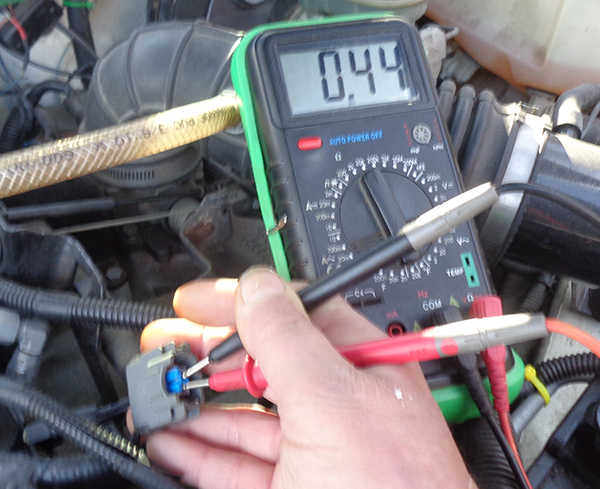
If your IXR™ is connecting properly, you will see less than 1k ohms across the injector connector.
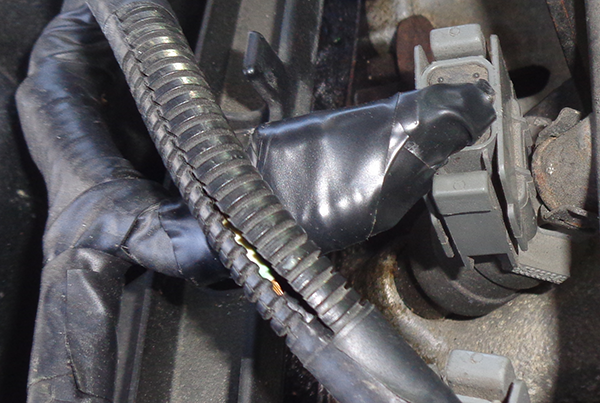
Next, carefully tape the IXR™ tightly to the wiring harness. Be careful not to pull the leads out.
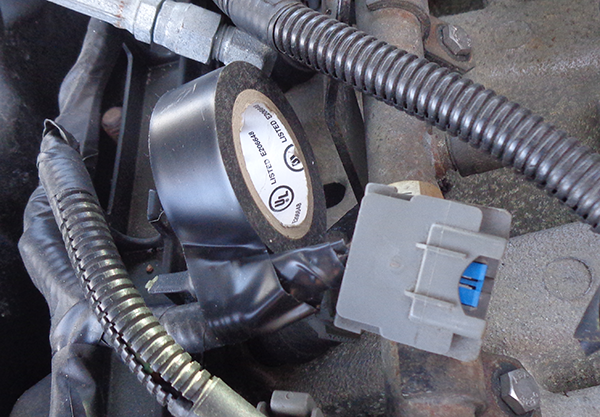
Tape everything in place.
Believe it or not, there is an IXR™ under that professionally installed electrical tape!
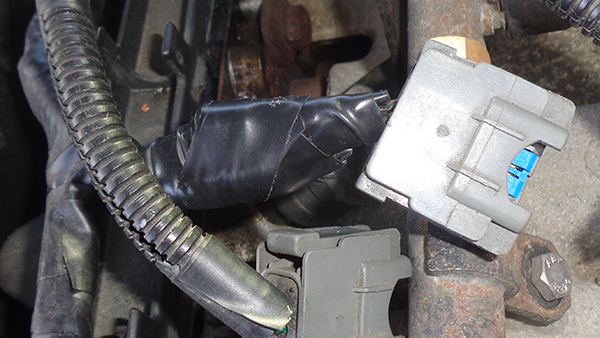
Use your ohm meter to verify the leads didn’t come loose when you taped them up. You will may have to
rework at least 1 or 2 of the connectors as the leads do tend to come loose (another reason to solder the
Interjector in place for permanent installations).
The IXR™ Connectors are making a good connection.
Reconnect the lead to the fuel injector and repeat for the rest of the cylinders.
Once mounted and taped in place, you hardly know it’s even there.

At a glance, you wouldn’t know I modified this engine.
Testing
After you finish the physical installation, take the vehicle for a test drive to verify the results. Drivability should be at least as good as it was before. There should be no misfires and no DTCs generated. Using your scan tool, observe your STFT% fuel trims. They should be more positive than they were before the installation. Since the IXRs show the ECU larger injectors, it will trim the fuel delivery back accordingly. Through the O2 feedback, it then enriches the AFR back to normal. Factory ECU algorithms are happy to add fuel, but are tightwads when it comes to reducing fuel. This is why the IXR works so well.